Saturday, August 7, 2010

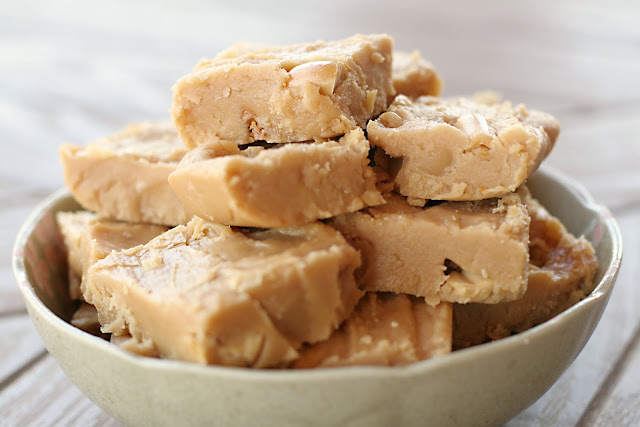
Heavenly Peanut Butter Fudge


Or maybe it should be called, "Hellish."
It's probably a ton of calories...
I missed our annual family camping reunion last week.
Again, due to the hugeness of my belly.
I got to thinking about all of the awesome food I would be missing.
So, I gave grandma a call and got her Peanut Butter Fudge recipe, a staple item at the reunion.
You may want to share this with a neighbor, if you find yourself devouring the entire pan!

Ingredients:
1 cup 1/2 & 1/2 (i used whole milk cause i was too lazy to go to the store - not quite as rich, but still great)                         
2 cups sugar
pinch of salt
1 T. Light Karo Syrup
5 HEAPING T. of Peanut Butter (don't hold back!)
3 T. Butter
1 1/2 tsp. Vanilla
1 cup Walnuts (I used peanuts)


Put the 1/2 & 1/2, sugar, salt & Karo Syrup  into a pot and heat until simmering. Let simmer and stir frequently for around 15-25 minutes.
After 15 minutes have passed, test to see if it is ready for the next step.
To test, fill a cup or shallow bowl with cold water. Add an ice cube or two to make it nice and cold.
Get a small spoonful of the simmering mixture and submerge it in the water. Then, use your finger to try and mold it into a little soft ball. If it doesn't work, try simmering for a few more minutes. Keep trying until you get that nice soft ball.
Remove from the heat, and add the remaining ingredients.
Mix it and whip it with a wooden spoon for a while.
Pour into an 8x8 greased pan.
Let cool before cutting into squares.


Wednesday, August 4, 2010

Labeled Cups

I finally got sick of washing tons of cups every day!
I found some cheap ($.60) cups the other day and labeled them with each boy's name.
Now, they use the same cup all day long.
No germ swapping and less dish washing!
Yeah!
Why did I wait all summer to do this?

Friday, July 30, 2010

Blow It Up!

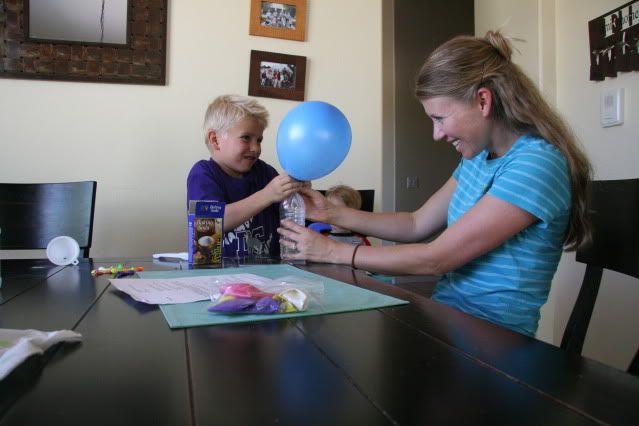
Here's a little science experiment that C and I did last summer.
Found directions for ya at Funology.com.
It's a great website for all kinds of funstuff.

Wednesday, July 28, 2010

Don't Forget About the Game Closet!

Today was not going well. 
In the morning they went to a little community soccer camp for a few hours.
I did my best to make suggestions of fun things to do throughout the day.
But, in the afternoon, they watched movies, played video games, read books, and FOUGHT with each other!!!
I was trying to make dinner and each one of them earned a time out for various reasons. Just one of those days.
So, while I was waiting for dinner to cook, I decided to teach my oldest to play a card game, Crazy 8s. He really liked it. And, it helped to separate all of the boys for a while.
Then, I played a board game with the 5 year old.
Sometimes I just forget about all of the games we have in our hall closet.

Here are some of our favorites:
  • Zingo (it's like Bingo, but w/ pictures - no reading necessary)
  • Jr. Scrabble
  • Guess Who?
  • Memory
  • Chutes & Ladders
  • Slap Jack (played w/ face cards)  Directions
  • Crazy 8s (played w/ face cards) Directions


*What are some of your kid's favorite games?
and,
What ages are they best for?*

Sunday, July 25, 2010

CD Spinners

Saw this idea in a Family Fun magazine in a waiting room the other day.
I love easy, fast crafts. I typically don't have the patience for anything else.

Materials:

CD
Shooter Marble (the others are too small)
Glue
Water Bottle Top
Spinner Template (optional)


go HERE to download a template for the CD SPINNERS craft. The template will be on the front page under "Featured Ideas."
You can make these without the template. It just makes them more colorful and fun to watch.
You could also just decorate your Spinner anyway you want.

DirectionsColor the template and adhere it to one side of the CD.
Glue the marble on the center of the CD.
Glue the water bottle lid to the center of the other side of the CD.
Let dry.
Use the water bottle lid as a handle and SPIN!


Friday, July 23, 2010

Wednesday, July 21, 2010

Homemade Butter

Do you celebrate Pioneer Day? the 24th of July?
Growing up, my family would always celebrate with cousins, bbq and a rodeo.
This year, due to my very large belly, I think we'll stay home.
But, to give my kids a little taste of pioneer life, we made our own butter.
I used to make this while teaching school as part of a social studies lesson.
Here's how, if you'd like to give it a try:

Ingredients:
all you need is some
Whipping Cream & Salt

Put some whipping cream in a canning jar, or whatever jar you'd like,
(I put about 1/2 pint of whipping cream into a pint jar, so it would have plenty of room)
Shake, Shake, Shake until the cream turns mostly solid and separates
(took us less than 10 minutes of shaking)

looks a little something like this

Pour off the excess milk
Add a bit of salt to taste
And, you've got BUTTER!